Alex Galuzin.com
Documenting My First Fight Photography Event: BCT Championship (Palmetto, FL)
Photography
September 27, 2025
On September 27th, 2025, I photographed my first official fight event.
It was put together by Eric and Ethan Marshall from EMK Final Round Academy and the event was BCT: Bite Down, Chin Down, Throw Down Championship.
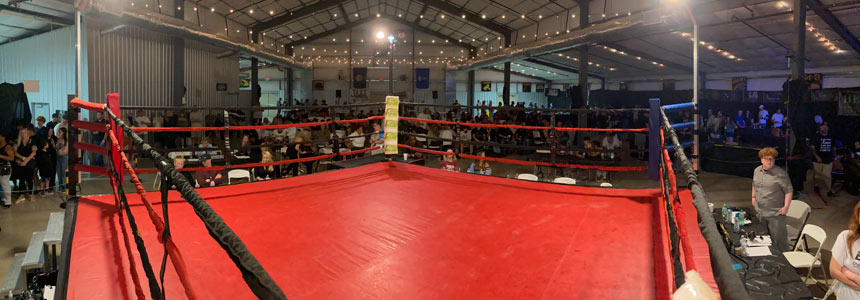
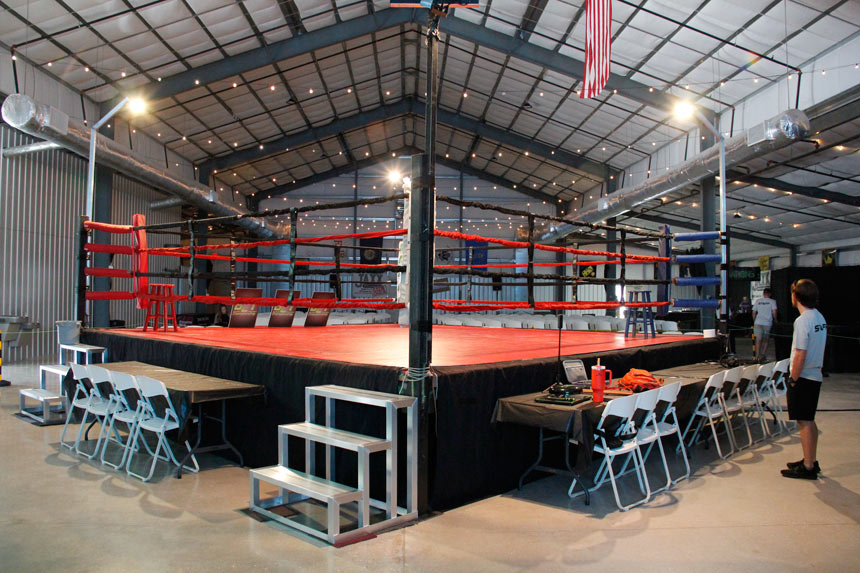
It took place at the Palmetto, Manatee Fairgrounds, inside a ring and featured boxing and kickboxing. No MMA this time.
In this post I wanted to breakdown what I did, how I did it and the results I captured as I documented my first fight event.
Let's get into it.
The Gear I Used
First up is the gear I used.
The camera was Canon 60D DSLR with EF-S 18–135mm f/3.5–5.6 lens.
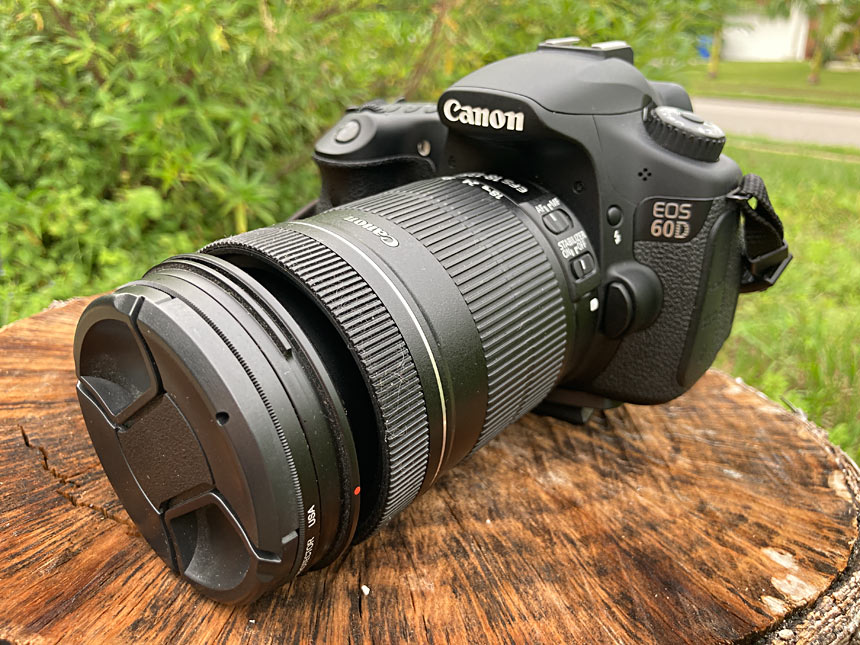
60D is an older camera, I bought it in 2011. Although being a great entry-level camera for beginners it's far from being ideal gear in a fight event scenario.
Despite that, I was still able to get some great shots and capture the entire event.
F3.5, 1/640s, ISO 12800, 18mm
The lens was a variable aperture, meaning that at its widest (18mm), it opened to f/3.5. As you zoomed in past certain focal lengths, the minimum aperture increased to f/5.6.
But the wide angle at 18mm allowed me to get close up shots when the action was near the corner where I was.
F3.5, 1/500s, ISO 12800, 18mm
And zoomed in to 135mm allowed for close-up shots across the ring. Although the minimum aperture quickly jumped to 5.6 as I began to zoom, taking away from available light.
F5.6, 1/250s, ISO 12800, 135mm
60D Camera Settings for a Fight Event
I had never shot an event like this before but I knew enough about the camera to maximize its limitations and I knew a lot about the fight game..
I primarily shot in shutter priority mode as I needed to control my shutter speed to freeze the action and freeze the motion without having to worry about aperture or ISO.
I set my shutter speed 1/640 to 1/800 of a second.
In boxing and kickboxing, punches and kicks fly extremely fast so you'd want the shutter speed around 1/1000th of a second or more.
Higher shutter speed is better.
However due to the camera, the lens I was using and the low-light conditions of fight venue, I could only get my shutter at max to 1/800 of a second. Anything higher gave m under-exposed images. My gear wasn't fast enough to go higher.

F5, 1/500s, ISO 12800, 47mm
Now the ISO was set manually to max 12,800.
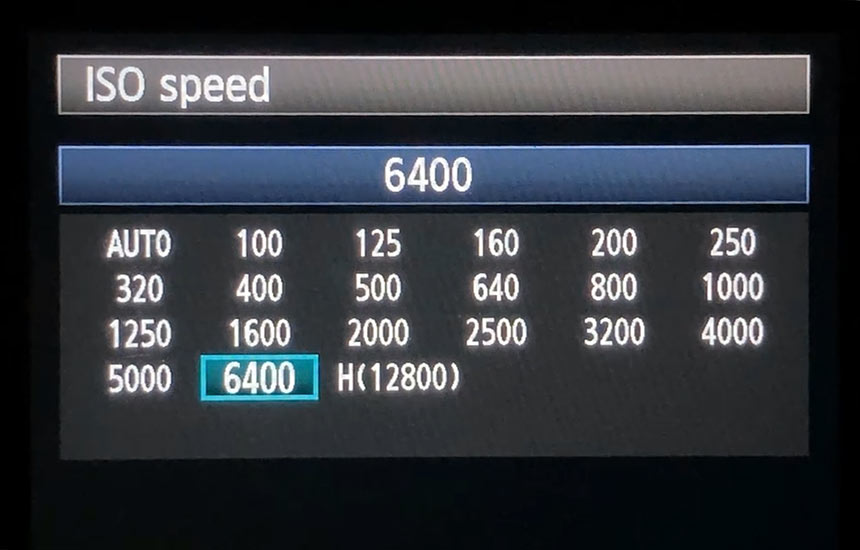
Canon 60D default max ISO will go to 6,400. But you can max out to double that amount in the settings.
You can see this video on how to do so.
Dealing with High ISO and Noise
Shooting at such a high ISO introduced a lot of noise and grain into the images. I didn't really have a choice if I wanted to keep my shutter speed high enough to freeze the action.
But I didn't mind the grain.
Fight events have a naturally grungy, gritty atmosphere so the noise actually added to that mood and the atmosphere.
F4.5, 1/500s, ISO 12800, 33mm
Of course, if I could have reduced it without sacrificing shutter speed, I would have. But given the limitations of the camera and lens, the grain became part of the story.
The Fight Event Capture
I started by capturing everything before the fights: the back room, medical check-ins, fighters warming up, people arriving.
Besides the fight themselves, this is by far my favorite part to document.
The calm before the storm. The silence before the violence.
F5, 1/80s, ISO 3200, 18mm
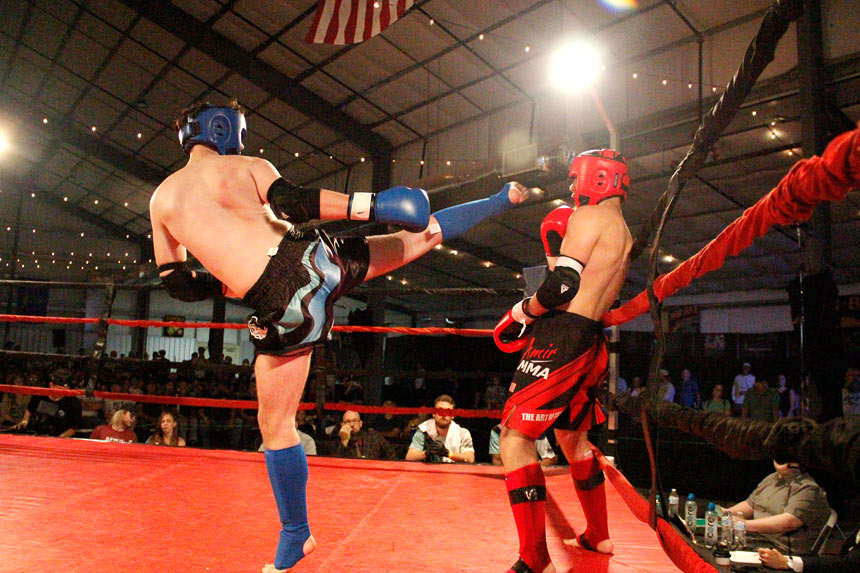
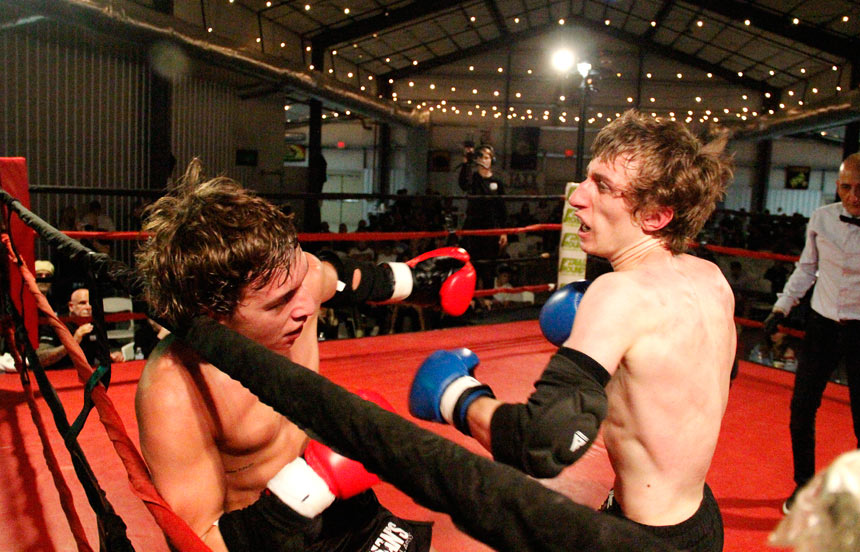
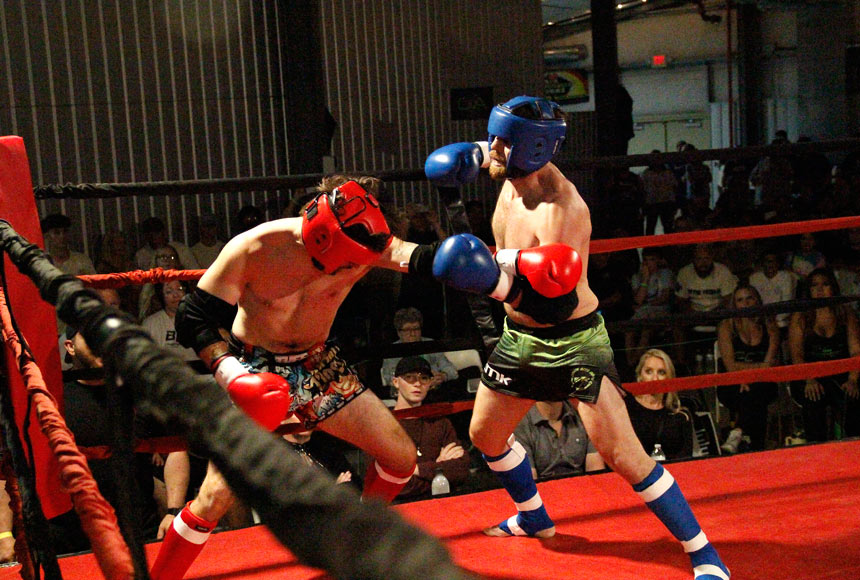
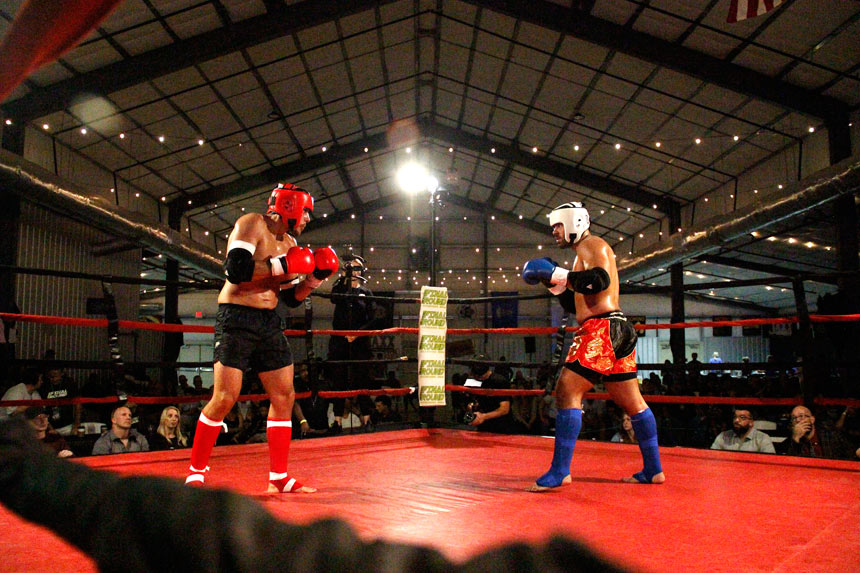
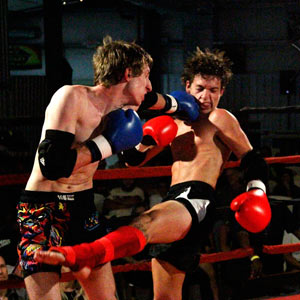
Then, once the event began, I was ringside.
I shot the fighters walking in, getting into the ring and then the entire fight.
Some fights were 2 rounds, some 3, with rounds lasting 2-3 minutes depending on whether it was boxing, kickboxing or a main event.
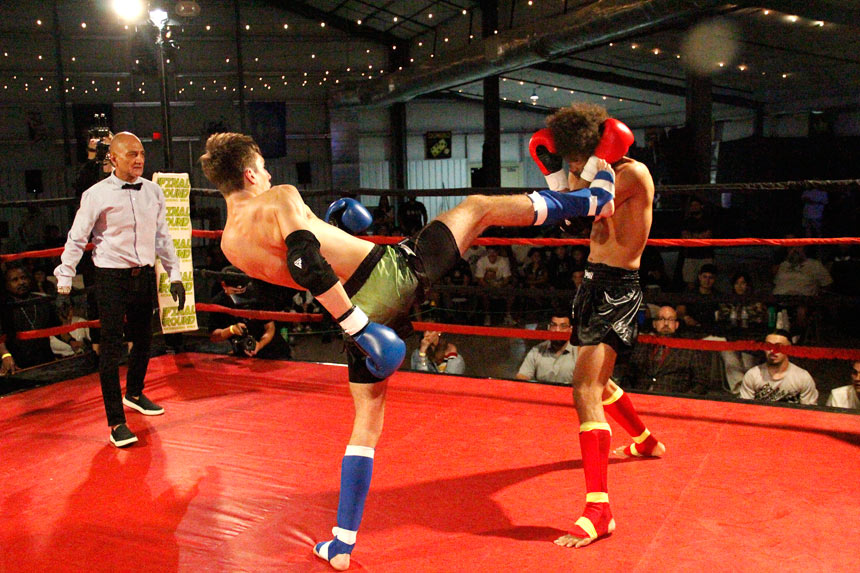
F4, 1/500s, ISO 12800, 24mm
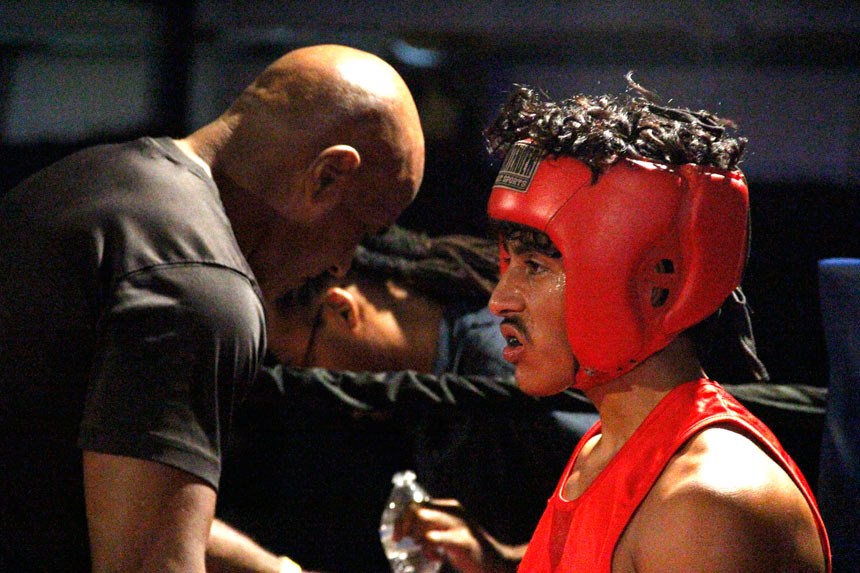
The 1 minute rest in-between the rounds is also key to capturing. This is time for instructions, mindset shift or both. Important minute in the fights.
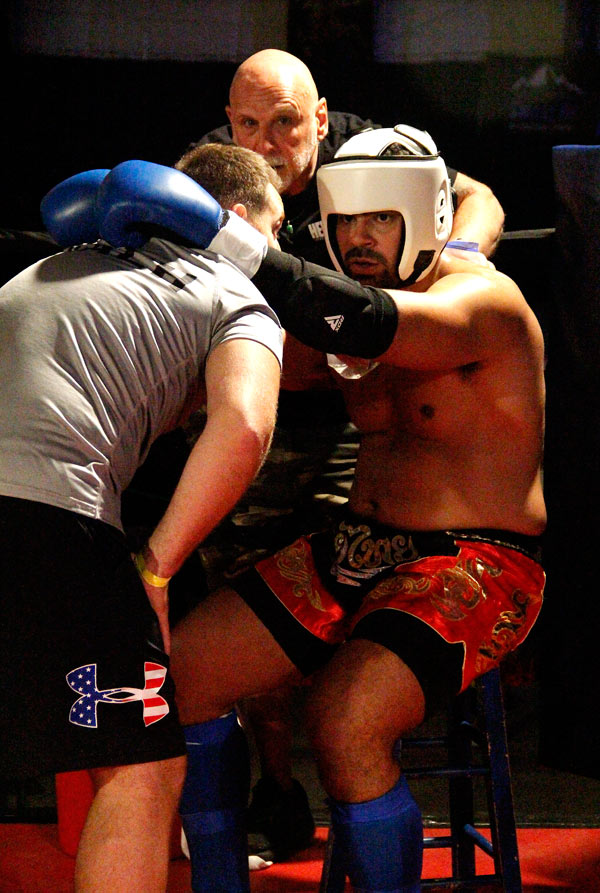
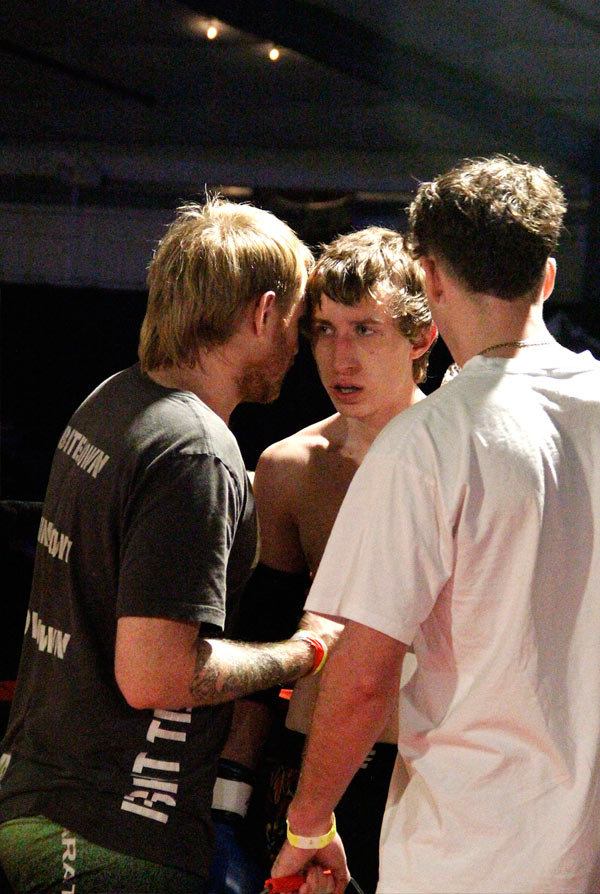
Image 1 - F5.6, 1/250s, ISO 12800, 62mm; Image 2 - F4, 1/250s, ISO 12800, 69mm
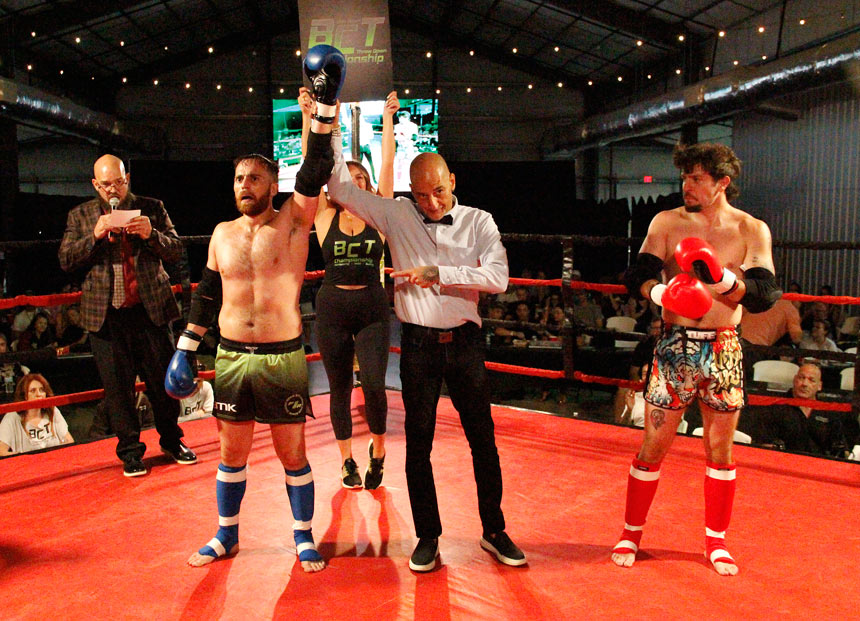
After each fight ended, whether by decision, TKO, KO, stoppage, towel throw or disqualification I'd quickly move around the ring, get inside, and capture the winner's hand being raised, the emotion of the moment, and then shots with their coaches.
F4.5, 1/250s, ISO 12800, 20mm
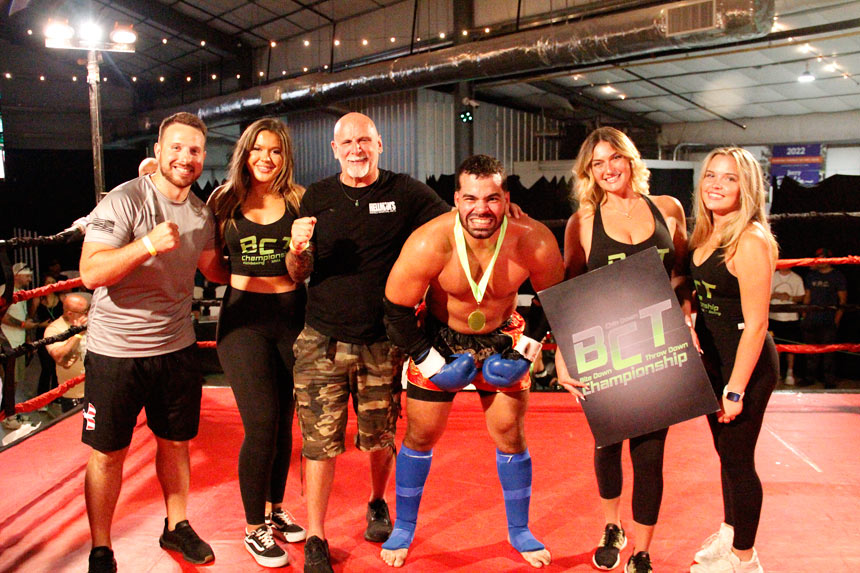
F3.5, 1/250s, ISO 12800, 19mm
Everything moved so fast. There was no time to plan ahead. You simply react and capture to what's happening in real-time.
The event itself, from doors opening to the last fight, lasted about 6 hours. But if you are shooting an event like this, you get there 2-3 hours before it starts.
Editing the Images
By the end of the night, I had captured over 3,500 shots.
Being my first fight event, I did capture more than I needed. Better to have it and not need it than miss the shot and not have it.
I also didn't use Lightroom to edit. Not for this first fight event. I went through every single image manually and I also edited them manually with Photoshop.
I quickly changed this approach for my next fight event.
Quick Workflow I used:
- First pass: delete the bad images, keep the decent ones.
- Second pass: select best of the best to edit and to deliver.
- Third pass: batch edit small groups of 15–20 images at a time in Photoshop. Adjusting levels, contrast, saturation and color.
Once I was done with all the edits, I uploaded the finals to Google Drive to share with the promoter.
What I Learned
I learned a lot doing this first fight event. As you can't go through such an experience and not learn something.
- Get a new camera, better and faster gear
- Start using Lightroom for selections, edits, exports etc
- There are a standard set of shots I need to get such as walk-ins, the fight, the in-between rounds, the winner with hand raised and the winner with coaches
- Know you camera and your camera settings
- Use Servo auto-focus option
- Use continuous shooting
- Need more fight event experience and learn to take better shots
After the Fight Event
After the fight event I knew that if I was going to continue doing this then I needed to upgrade my camera gear.
So 2 days later I bought Canon R6 Mark II and RF 24-105mm f/4 USM lens.
After this fight event, I've made the decision to become the best fight photographer I can be, to start capturing raw emotion and freezing the fight motion.
Onto the next fight event!
F3.5, 1/500s, ISO 12800, 18mm
"Preproduction Blueprint"
I wrote a book on how to plan your level designs and game environment art. Buy the book in PDF, Paperback or Kindle version.
Subscribe: AG Email Updates
Follow Me


Recent Posts
-
 Why I Bought Canon R6 Mark II
Upgrading and buying a new camera Canon R6 Mark II. -
 Canon 60D: Max ISO 12800
How to max out your ISO on Canon 60D. -
 Fight Event: BCT1
Documenting and capturing first fight event. -
 Capturing Lightning Tips
Capturing lightning for first time tips. -
 Photography Experiments #1
Collection of best photos part 1.
About AlexG

Your Support Makes This Blog Possible
Some of the blog posts may include Amazon affiliate links to mentioned camera gear and related products. I am an Amazon Associate and earn a small commision from qualifying purchases. Your support helps to continue running the website and sharing my photography experiences on the blog.